Recipes

Palmier / Pig’s Ear Pastries

Known as palmier in their native France, but as pig’s ears to the rest of us, it is easy to understand why so many across the world have fallen for these sweet, buttery treats! After all, what’s not to love? A delight on their own or dunked in coffee, these wonderfully simple pastries are hard to resist.

Even though they may look complicated, palmier are anything but, and are actually surprisingly easy to make at home. In fact, they are quite possibly the simplest pastry I’ve ever attempted! Requiring just two basic ingredients, palmier is one of the most economical sweet treats you can make: all you’ll need is a roll of store-bought puff pastry, a cup of sugar, some folding skills, and that’s it!

As with all pastries, the temperature of the dough is essential. In this instance, it must be fully defrosted, but still chilled. If it is too warm, the butter in the pastry will melt too quickly in the oven – you won’t get a crisp finish as the butter will ooze out of the pastries and burn. It is best to defrost the puff pastry in the fridge overnight so that it is ready and waiting for teatime the next day.

Personally I don’t like to use too much sugar, instead preferring to give them a quick dab of apricot jam when they are fresh out of the oven – the sweetness of the glaze is enough for me, but this is entirely down to taste. Whilst on the topic of preferences, I like my pastries to be slightly on the “burnt” side, but if that’s not your thing then just take them out of the oven a couple of minutes early.  If you would like to expand on the traditional butter and sugar recipe, you can always add a teaspoon of ground cinnamon to the sugar.

To discover other delicious Sweet Treats from The Muddled Pantry, please click here

Click here for the recipe

Dak-dori-tang 닭도리탕 (Korean Spicy Chicken Stew)

North or South, Koreans share a universal love for spicy food, and it doesn’t get much more fiery than this hearty stew.

Dak-dori-tang (spicy chicken stew), also known as dak-bokkeum-tang, is a perennial Korean classic, and though the recipe varies across the peninsula it is almost always both fierce and comforting at the same time. Traditionally made from a whole chopped chicken, onions and potato, the recipe can be adapted to your tastes and needs. Though skinned chicken breasts can be used, I personally prefer using boned thighs – they hold up better against the robust sauce, and don’t tend to dry out during the intense cooking process. With regards to the vegetables, again the recipe can be modified to include almost anything you have to hand: carrots, daikon, leeks – all make excellent additions.

Though classified as a stew, dak-dori-tang is actually more of a braise as the liquid is reduced over a high heat, leaving you with a thick and spicy sauce. As the cooking time is quite short (about 30 minutes), it is best to par-cook the harder vegetables before adding them to the sauce. If you opt to use bone-in chicken, it is important to use equal size pieces, making sure that they are well-browned beforehand and you adjust the cooking time accordingly.

Dak-dori-tang 닭도리탕 (Korean Spicy Chicken Stew)

Dak-dori-tang made with chicken pieces on the bone.

Although spicy by nature, dak-dori-tang is no less delicious when made slightly milder, if preferred. Despite their volcanic appearance, Korean chili powder (gochutgaru) and chili paste (gochujang) are actually not anywhere near as hot as they look, making it is quite easy to adjust the dish’s heat without being at the expense of flavour. They actually add a wonderful earthy, smoky undertone, and are definitely worth a trip down to your nearest Asian Supermarket. Though generally quite expensive, both have a very long shelf-life and if you plan to make Korean food they are essential Pantry items. Keep an eye out for Chinese brands as these are often considerably cheaper than their Korean counterparts, with no discernible difference in taste. On that note, a word of warning: under no circumstances should you substitute gochutgaru with any other type of chili powder. Anything else will be way too hot and will undoubtedly be the ruin of your dinner.

Disaster awaits all who are even tempted to try…

For more Korean recipes from The Muddled Pantry, please click here.

For tips on stocking a Korean Pantry, please click here

Serve with: freshly cooked white rice along with a select of banchan (Korean side dishes) – I suggest some simple stir-fried cabbage and, of course, a generous portion of mak kimchi!

Click here for the recipe

Sambal Kacang Goreng (Malaysian Spicy Fried Green Beans) 

It never ceases to amaze me how our tastes can change over time and through circumstance. What was once maligned becomes much loved, and benevolence finds itself curing into something of an obsession. Though it is embarrassing to admit now, this was very much the case with this recipe.

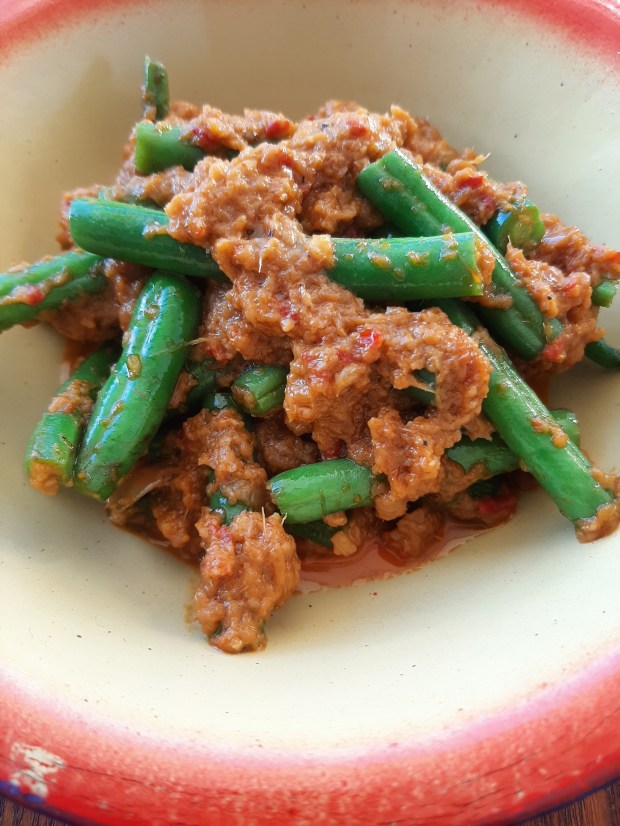
It’s fair to say that I haven’t always been a fan of this wonderful Nyonya dish. It’s not that I’ve ever actually disliked Sambal Kacang Goreng (green bean sambal). It is, after all, a true Malaysian classic, and justifiably so. But growing up in Penang meant never having to settle for anything less than what you actually wanted to eat, and for me there was only ever two sambal dishes worth ordering – Sambal Kangkong and the almighty Sambal Petai. Blinkered by such delights, I never really even considered many of the other amazing sambal goreng dishes out there…until, that was, I left Malaysia and her bounty of fresh ingredients.

Culinarily speaking, it was a calamitous time in my relationship with Malaysian food, a make or break moment that ultimately culminated in starting The Muddled Pantry. Indeed, the availability of fresh Asian ingredients has always been, and continues to be, the greatest challenge for many Asian expats the world over. And though access to fresh exotic ingredients has improved considerably, supply remains frustratingly erratic. Even if you do find a source of fresh produce, it is often short-lived . If there’s anything my 30’odd years as a Malaysian expat has taught me, is that you have to learn to make the most of what’s available. Admittedly I am blessed to call South Africa home, so I have no shortage of great local produce all year-round; and one thing we do certainly have a bounty of are green beans! Affordable and (more importantly) freely available, green beans were naturally on the top of my list of substitutes. It didn’t take me long to buy a bag of beans and give them the sambal treatment.

Oh what a foolish child I’d been. At first bite I knew I was tasting a delicious slice of humble-pie. I had to look no further, I had found a worthy contender. By the second mouthful, King Kangkong was off its perch. Come the third, I was completely sold! What a revelation. Heady, spicy, and evocative, the dish was everything I had hoped it to be. Cooked through just enough to retain an essential bite, the beans more than held their own against the spiciness of the robust sambal – something that is key to the dish.

Though it is a remarkably easy dish to make, and is ready in just 15 minutes, just be mindful not to add too much water. It is important to only add splashes of water around the sides of the hot wok. This gradually steams the beans in the sauce and will help retain their bite – if you add too much too quickly, you’ll dilute the sambal and risk boiling the beans instead.

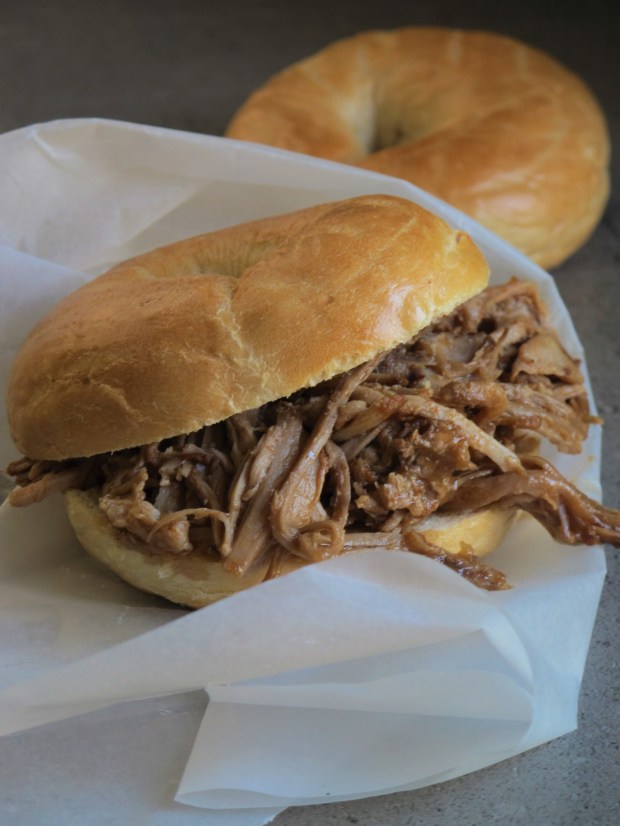
Undoubtedly at peak crispness straight from the wok, this dish can also be served later at a tropical room temperature; or reheated even (just add another splash of water to loosen the sauce). Resting and reheating will result in a tougher bean, but equally it gives space for the flavours to evolve. Both options are as different as they are delicious; a matter of taste really. Not that I’m trying to sway you either way, but my personal favourite is to have it slightly warm, between two slices of fresh white bread.

For me at least, in South Africa, it’s become the best thing between sliced bread.

Note: Traditionally made with yard beans, and these being considerably harder than the variety many of us are accustomed to, using fine green beans would not be recommended; they lack the robustness of an older bean, and would succumb to the sauce.

To discover other delicious Malaysian recipes from The Muddled Pantry, please click here

Click here for the recipe

Inche Kabin (Nyonya Fried Chicken)

A delectable Nyonya classic, Inche Kabin will have you licking your fingers and asking for more! Deep fried chicken morsels, marinated in a thick coconut and spiced rub, Inche Kabin is bursting with flavour and always goes down a treat.

Though not personally au fait with the origins of Inche Kabin, the reigning queen of Nyonya Cuisine Pearly Kee, refers to the dish as lipstick chicken and speaks to its importance in Nyonya culture. Often served when presenting debutantes to the society, these bite-sized pieces of chicken were the perfect option to keep the young ladies feed, allowing them to maintain their poise and dignity whilst nibbling on tasty snacks. After all, heaven forbid your future wife be seen chewing in public! Oh how the world has changed…And as to why it’s also known as lipstick chicken? I’m still not sure. It may well be poetic license, but I can only surmise that the residue of oil from the deep fried chicken upon the lips has something to do with it. I guess glossy lips have always been in vogue, even if its just a bit of grease from too much Inche Kabin!

As with all deep fried chicken, the key to a good Inche Kabin is, rather unsurprisingly, the frying. Three times seems to do the trick, resulting in a crispy crust of spices. Traditionally chopped up chicken legs are the cut of choice, but I also like to use chicken wings for the recipe. Though obviously not as meaty as the leg, the wings are nonetheless delicious and not prone to drying out. Either would work, its really up to you.

Another key component to the dish is the dipping sauce. Never served without it, the simple piquant sauce adds just enough ‘zing’ to cut through the spice crust, making the Inche Kabin even more irresistible!

To discover other delicious Malaysian recipes from The Muddled Pantry, please click here

Click here for the recipe

Kari Nenas (Malaysian Pineapple Curry)

Kari Nenas (Malaysian Pineapple Curry)

From the heady spiced tagines of Morocco, to the British classic of roast pork with apples, almost nothing divides diners as much as the testy subject of fruit in cooked dishes.

Though their inclusion is widespread throughout some of the world’s greatest cuisines, there are many among us that nevertheless rile against it. To those, the combination of fruit and savoury is tantamount to flavour blasphemy! Now I’m not here to convert you (what’s the point, you’ve probably searched “Pineapple Curry” on the internet, so you are likely already a fan!), but when paired correctly, fruit can be a masterstroke ingredient in many a dish. Whilst I have a couple of fruity dishes that qualify as firm family favourites, one dish in particular holds a very special place in my heart: Kari Nenas.

The first time I had this wonderful dish was when I was a child at my youngest uncle’s first wedding. Set deep within the verdant Malaysian jungle, the wedding took place in an achingly idyllic kampong (village). And though I am a little vague on the nuptial itself, the one thing I certainly do remember was the feast that followed. Laid out along the worn wooden floors of the traditional stilted house, was a resplendent collection of Malay dishes, all lovingly prepared by the ladies of the house. All the great classics were there – beef rendang, kari kapitan and, of course, lots of roti jala to mop it all up! I recall taking my place on the floor, ready to tuck in, when I noticed the dish right in front of me was altogether unfamiliar. Yes, it was the Kari Nenas. A fussy eater at the time, I was more than a little hesitate to try it, but after some prompting from those around me, I acquiesced and tried it. I was immediately hooked! Enriched with creamy coconut milk, the dish was an irresistible mix of sweet and sour. Delicious in of itself, the dish also brought harmony to the multitude of flavours on offer. In fact, this was quite possibly the first time I became aware of balance as a concept in relation to flavour: quite a moment in a food blogger’s life!

Unlike many dishes with fruit in them, Kari Nenas is all about the pineapple. Typically fruit is added to compliment meat and/or sweeten a sauce, but in this case the fruit flies solo. The secret of its success lies in the combination of coconut milk and tamarind, both of which cut through the sweetness of the fruit. A slight hint of chili rounds off the dish perfectly.

Quick and easy to make, kari nenas isn’t really a curry to be eaten on its own, but rather as part of a larger spread. As I mentioned previously, it goes especially well with beef rendang, lots of sambal belacan and perhaps even with a simple green bean omelette and some rice.

To discover other delicious Malaysian recipes from The Muddled Pantry, please click here

Click here for the recipe

Cape Malay Malva Pudding

Cape Malay Malva Pudding

A veritable heart-attack on a plate, Malva Pudding is quite literally the definition of a dessert to die for!

The very first South African dessert I learnt to make upon arrival upon these shores, it may as well have been my last. Arguably the nation’s most loved traditional dessert (and certainly my partners favourite), Malva Pudding’s enduring appeal is understandable given it embodies everything my adopted country love in their desserts. Sweet, comforting and unpretentious, this classic pudding has it all! As they say here in South Africa, “who doesn’t love a good malva?”. Indeed.

On the face of it Malva Pudding is little more than your basic sponge, but is transformed when soaked in an achingly sweet cream and butter sauce. The addition of apricot jam and a magical combination of boiled milk and vinegar, turns this humble pud into the moist desserts, the such dreams are made of.

Always served warm, Malva Pudding is the prefect dessert to get you through those dark winter nights. Traditionally it is served with either cold custard (never hot), whipped cream or even vanilla ice-cream. Malva Pudding also reheats very well, a few seconds in the microwave is all it takes to revive its gooey glory!

For more South African recipes from the Muddled Pantry, please click HERE

Click here for the recipe

Ayam Masak Merah (Malaysian Red Cooked Chicken)

As a child I wasn’t a great fan of spicy food, in fact I loathed it. Having grown up in Malaysia this presented a very real challenge, especially for my grandmother. The undisputed Queen of the Kitchen, my amah was always keen to entice me over to the spicy-side and did so through a protracted period of gentle assimilation, incrementally introducing my tender palette to the delights of one of my family’s greatest obsessions: chili.

One of my earliest memories of eating around the family dining table was watching as the Ghani men ate raw chili padi dipped in hecko sauce (it was always the men, the woman seemed to have more sense). Egged on by brotherly bravado, my father and uncles would pop these searing missiles into their mouths, chewing and grunting in apparent pleasure, all the while wiping their brows with handkerchiefs damp with sweat. This would go on until the large plate of chillies was laid bare and their stomachs churning in revolt. Apparently, this is what my amah was coaching me for, an adulthood of chili padi and agonising trips to the loo! It was a terrifying prospect to one so young, but thankfully she started me off easy and that is how Ayam Masak Merah become a childhood favourite of mine!

Despite it’s rather alarming name, Masak Merah (red cooked) is actually one of the milder dishes amongst the pantheon of Malaysian curries and was the perfect vehicle to get me started on, what to be, my love affair with all things spicy. Unlike most other Malaysian curries where the use of coconut milk is ubiquitous, Masak Merah is tomato-based, hence the name. Reliant on tomato rather than chili for its colour, the dish is fiery red but without the burn associated with its devilish hue. As it is still ostensibly a curry the use of chili is a prerequisite, but the quantities of such can be reduced without losing the appeal of the dish, making it an excellent option for those adverse to too much heat, especially children.

Quick to make and utterly delicious (even when eaten on the day it’s cooked), my fondness of Masak Merah followed me long after I have graduated to spicer dishes. When I moved to the UK it was one of my favourite tastes-of-home, and whenever I came back from a holiday in Malaysia my bag was always loaded with packets of Brahim’s Masak Merah sauce! Like most expat Malaysians I never bothered to learn how to make our favourite dishes, especially when the quality of readymade sauces were so widely available. Sadly, upon moving to Cape Town, my trips back to Malaysia diminished and with it my supply of those handy packs of Brahim’s. As is the case, there was only one thing for it: I would have to learn to cook Masak Merah myself!

Finding a decent recipe for this beloved childhood dish was surprisingly hard and almost all of my previous attempts fell woefully short of expectations. Cans of tomato soup seemed to dominate the recipes, but as far as I could recall I’d never seen a tin of Heinz in amah’s cupboard, much less in her Masak Merah! Disappointed, I did what every sensible Malaysian does and turned to the family WhatsApp group. Of course, they didn’t disappoint, and the recommendations came flooding in almost immediately. Initially most of these seemed similar to the recipes I’d already tried, but then came the motherload, a message for my aunt, Rohani Jelani. One of Malaysia’s preeminent food writers and cooks, hers was the Masak Merah I had been hoping for and it didn’t disappoint! Simple, both in method and ingredients, this was Malaysian home cooking at its best, and with just a few tweaks was the closest I’ve come to finding a recipe that matches my recollection and expectations. Amah would be proud.

Note: Though not traditional, you could also use jointed chicken wings. Simply dust the wings in seasoned flour, dip in egg and then coat in flour. Deep-fry before adding to the sauce. Reduce to its nice and sticky. Delicious!

To discover other delicious Malaysian recipes from The Muddled Pantry, please click here

Click here for the recipe

Cantonese Beef Steak

Some days you just wake up with a hankering for a really nice bit of steak, but if you are anything like me, that beefy craving is usually for steak of an altogether different variety: Cantonese beef steak!

Growing up in Penang in the early 80s the only time I really ate steak was at Chinese restaurants, where it was invariably prepared Cantonese-style. It is, therefore, hardly surprising that I’ve only recently begun to appreciate Western-style steak. Unnaturally tender and served with an addictively sweet soya-based pepper sauce, Chinese beef steak was undoubtedly the steak of my childhood! Of course, like all middle-class families in 80s  Penang we occasionally ate at the Eden

Steak House on Hutton Road, with its glorious coral décor and outlandish flourish of curly parsley (as children we were unconvinced that the parsley was, in fact, edible!). Looking back, we actually used to visit the Steak House quite often, but strangely enough I don’t recall ever actually ordering the steak. I’m pretty certain my father might have had it on occasion, but that was “dad food”. At any rate, who wanted steak when you could have lobster thermidor and prawn cocktail instead? This was, after all, the 80s…

So what makes a piece of steak Chinese?

The first thing that makes this dish such a Chinese classic is the sauce. Glossy and rich, this sauce is the perfect mix of sweet and peppery goodness – this isn’t a sauce for the faint of heart! The Worcestershire sauce adds spiced depth, whilst the tomato sauce imparts a hint of colour and extra body once everything has been reduced down to a sticky, gooey sauce.

Secondly (and most importantly) is the texture of the meat. Marinated in a batter made with corn flour, eggs and Bicarbonate of Soda, the beef is rendered meltingly tender – almost to the point that the texture of the steak no longer resembles meat. This might sound unappealing, but this technique of tenderising meat with Bicarbonate of Soda is fairly widespread in Chinese cooking where the quality of the meat is not always guaranteed. As unpalatable as it may seem, the use of Bicarb goes a long way in making the Chinese food you make at home actually taste like the cuisine you are striving to emulate. Authenticity isn’t always pretty, especially when making Chinese food!

For more Chinese recipes from the Muddled Pantry, please follow the link here.

For tips on stocking a Chinese pantry, please follow the link here.

Click here for the recipe

Gimbap 김밥 (Korean Seaweed Rice Rolls)

Food is so often about memory and for me gimbap will forever remind me of one thing: icebergs.

It may seem like an unlikely association to have with this Korean staple, but it’s hardly surprising given that first time I had gimbap I was sailing across an impossibly blue glacial lake in the heart of Patagonia. I watched with awe as an iceberg the size of a double-decker bus floated by like a feather on water, all the while merrily munching on my gimbap packlunch. It was certainly a surreal experience and one I’ll never forget, both visually and culinarily speaking.

Admittedly Argentina might seem like the least likely place to find gimbap (or kimbap), but our hotel in El Calafate was run by a delightfully un-Argentinian Korean family and they happened to offer gimbap as a packed lunch option. Of course I couldn’t resist ordering it for our planned boat tour on Lago Argentino! At this stage of our trip I was understandably sick of empanadas so I jumped at the chance to try something different. More than that, however, I was intrigued that these Korean expats had deemed gimbap worthy of re-creating in this one-horse town in the depths of Patagonia. It couldn’t be an easy (or cheap) undertaking, so to my mind it most definitely had to be worth ordering!

So yes, Koreans sure do love their gimbap.

With its origins found in the Japanese occupation of Korea, gimbap literally translates to seaweed (gim) rice (bap) and is Korea’s answer to sushi (specifically norimaki), but with a few key differences.

The first major departure is the rice. Whilst short-grained rice is used in both, the difference lies in the dressing. Instead of the rice vinegar dressing that is used in Japanese sushi, gimbap rice is seasoned with sesame oil and salt.

Secondly, the gimbap fillings are all pre-cooked which means that gimbap keeps for far longer than sushi does – making it a popular option for picnics and takeaway lunches. Although typically eaten alone, mini-gimbaps are also served as a side dish to the pre-eminent and spicy manifestation of Korean street food  that is ttoekbokki (떡볶이).

Another key difference is the texture of the seaweed wrapping. Although similar seaweed sheets are used in both gimbap and norimaki, the seaweed used for gimbap becomes much chewier as it is typically eaten long after it has been rolled and as such, absorbs the moisture from the rice.

There are really no limits to the variations of gimbap fillings, but generally speaking the most commonly found are sogogi (beef) gimbap (소고기 김밥) and chamchi (tuna) gimbap  (참치김밥). I have included the ingredient lists for both beef and tuna gimbap below. Once the ingredients have been prepared the process for making the rice and assembling the gimbap remains the same regardless of the fillings.

For more Korean recipes from The Muddled Pantry, please click here

For tips on stocking a Korean Pantry, please click here

Click here for the recipe

Southern-style Pulled Pork

It may seem like a classic overshare, but I recently had a brief (but torrid) romance with a slow cooker that I bought online. Alas it really didn’t end well, but in the three and a half days we were together we did manage to make one great thing – pulled pork.

Ah, pulled pork, how we all love thee.

Arguably the reigning darling of the slow cooking movement, pulled pork is America’s Deep South’s gift to the culinary world. Traditionally slow-cooked and smoked for hours on a barbeque, pulled pork can in fact be cooked in a number of ways including in a slow cooker or even in a conventional oven. I’ve only ever made pulled pork in a slow cooker and its always turned out great, but no matter which method you favour the key word is always SLOW – there is simply no rushing pulled pork.

Although most commonly made with a shoulder of pork, recipes for pulled pork vary wildly from region to region and state to state. Many recipes use a dry rub before cooking, whilst some just use a ‘wet’ recipe where a BBQ sauce is simply slavered over the meat before it’s cooked. Personally I prefer the dry rub method as it most definitely adds more flavour and complexity to the final dish. I also like to leave the skin on the pork as it just offers that extra assurance that the meat won’t dry out – simply peel it off and throw away once the pork is done.

When it comes to the actual “pulling” of the pork many recipes suggest using a couple of forks, but I like to get in there and use my hands. It may be a whole lot messier, but doing it by hand gives you more control over the texture of the pork and it makes it easier to identify any fat or gristle that you may want to remove.

Unsurprisingly, when it comes to serving pulled pork I’m a bit of a traditionalist – it can be served with any type of white bread (any burger bun, bap, pita or pretzel will do), but it should always come with a generous heap of coleslaw on the side (I’m obsessed with Asian Coleslaw at the moment) as well as some extra BBQ sauce.

Note: pulled pork freezes brilliantly

Click here for the recipe