I have an unholy passion for kimchi and I’m not ashamed to admit it! I simply can’t get enough of this spicy Korean delight and it seems I am not alone. Some of my most popular posts to date have been kimchi related, so I thought it was about time I fed our collective obsession and posted another kimchi recipe. So this time around, I’m making one of my favourite types of kimchi – kkakdugi or cubed daikon kimchi.
Perhaps second only in popluarity to the almighty mak kimchi, kkakdugi is a great addition to any Korean dining experience. As you would expect with any type of kimchi, this version of the Korean staple is wonderfully piquant and highly addictive; though unlike most others, daikon kimchi has a delightful crunch and crispness to it which helps temper the spiciness of the chilli powder.
Personally, I find the process of making kkakdugi marginally less involved than mak kimchi and the fermenting period is also a little bit shorter, meaning you don’t have to wait quite as along to tuck into your kimchi! On the downside, kkakdugi doesn’t seem to fair as well as other kimchis in terms of its shelf-life, however, this may have more to do with my lack of technique and experience than a shortcoming of the dish!
With regard to technique, making any sort of kimchi is a matter of trial and error. Whilst the core process for making kimchi remains similar for each variety, each version has its own quirks and it may take a few attempts before you end up with a kimchi that suits your own tastes and preferences. Making the perfect kkakdugi has, up to now, been particularly vexing for me as I often find the kimchi comes out too watery and the daikon too limp. I have now taken to draining off the excess water as the kimchi ferments and I have also stopped peeling my daikon – both these seemingly minor tweaks to the process has resulted in a far superior end result (at least in my opinion).
For more Korean recipes from The Muddled Pantry, please click here
For tips on stocking a Korean Pantry, please click here
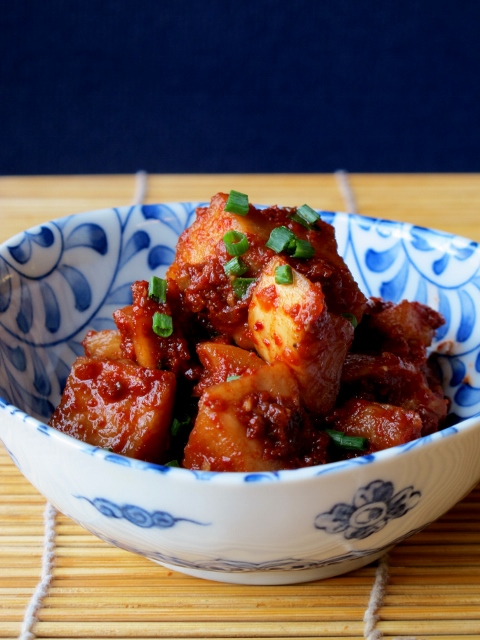
Kkakdugi 깍두기 (Cubed Daikon Kimchi)
- 2 large daikon radish (about 800g to 1 kg)
- 1 tbsp. salt
Kimchi Seasoning Paste:
- 1/2 cup Korean Chile Powder
- 2 tbsp. dried shrimp
- 2 cloves of garlic, finely chopped
- 4cm fresh ginger, peeled and finely chopped
- 1 small onion, peeled and finely chopped
- 1 tbsp. sugar
- 1/4 cup beef stock
- 2 tbsp. Korean anchovy sauce (or Thai fish sauce)
- 4 tbsp. chives or spring onions, finely chopped
Method:
- Trim the tops and tails of the daikons. Using a rough scrubber or some salt in your hands, clean the skin of the daikon to remove any dirt and grime – do not peel the radish. Cut the daikon into 2cm cubes (don’t sweat it if they aren’t all exactly the same size)
- Place the cubed daikon into a large colander and then (using your hands) mix in the salt. Place the colander over a sink and leave to brine for half an hour, after which lightly rinse the daikon and leave to drain completely
- Whilst the daikon is brining, start making your seasoning paste
- In a food-processor, add the onion, garlic, ginger, dried shrimp and sugar – blend until smooth. Add the anchovy sauce and the beef stock, pulse until combined. Decant the blended mixture into a large bowl and add the chilli powder – mix to combine. Do not mix in the chilli powder in the food-processor as it will stain the plastic. Set the seasoning paste aside for 20 minutes to allow the flavours to mingle
- Add the brined daikon and the chives/spring onions to the bowl along with the seasoning paste. Mix to combine thoroughly, using your hands is best
- Place the daikon into a large clean glass jar with a tight-fitting lid, packing the kimchi down into the jar as tightly as you can. Add a splash of water to the empty mixing bowl, swirl it about a bit and then add to the jar
- Cover tightly and leave to ferment for a couple of days, after which store in the fridge
Note: As the daikon ferments, it will release a lot of water which will rise to the top of the kimchi – drain off most of this water before giving the kimchi a good stir. Do this before placing it in the fridge.
